Sell customized or personalized digital products
Sell customized digital content like artwork easily with Filemonk

Kartik
Last Update 9 μήνες πριν
If you sell customized digital products - like art made to a specific customer's needs, look no further than Filemonk to help you with it.
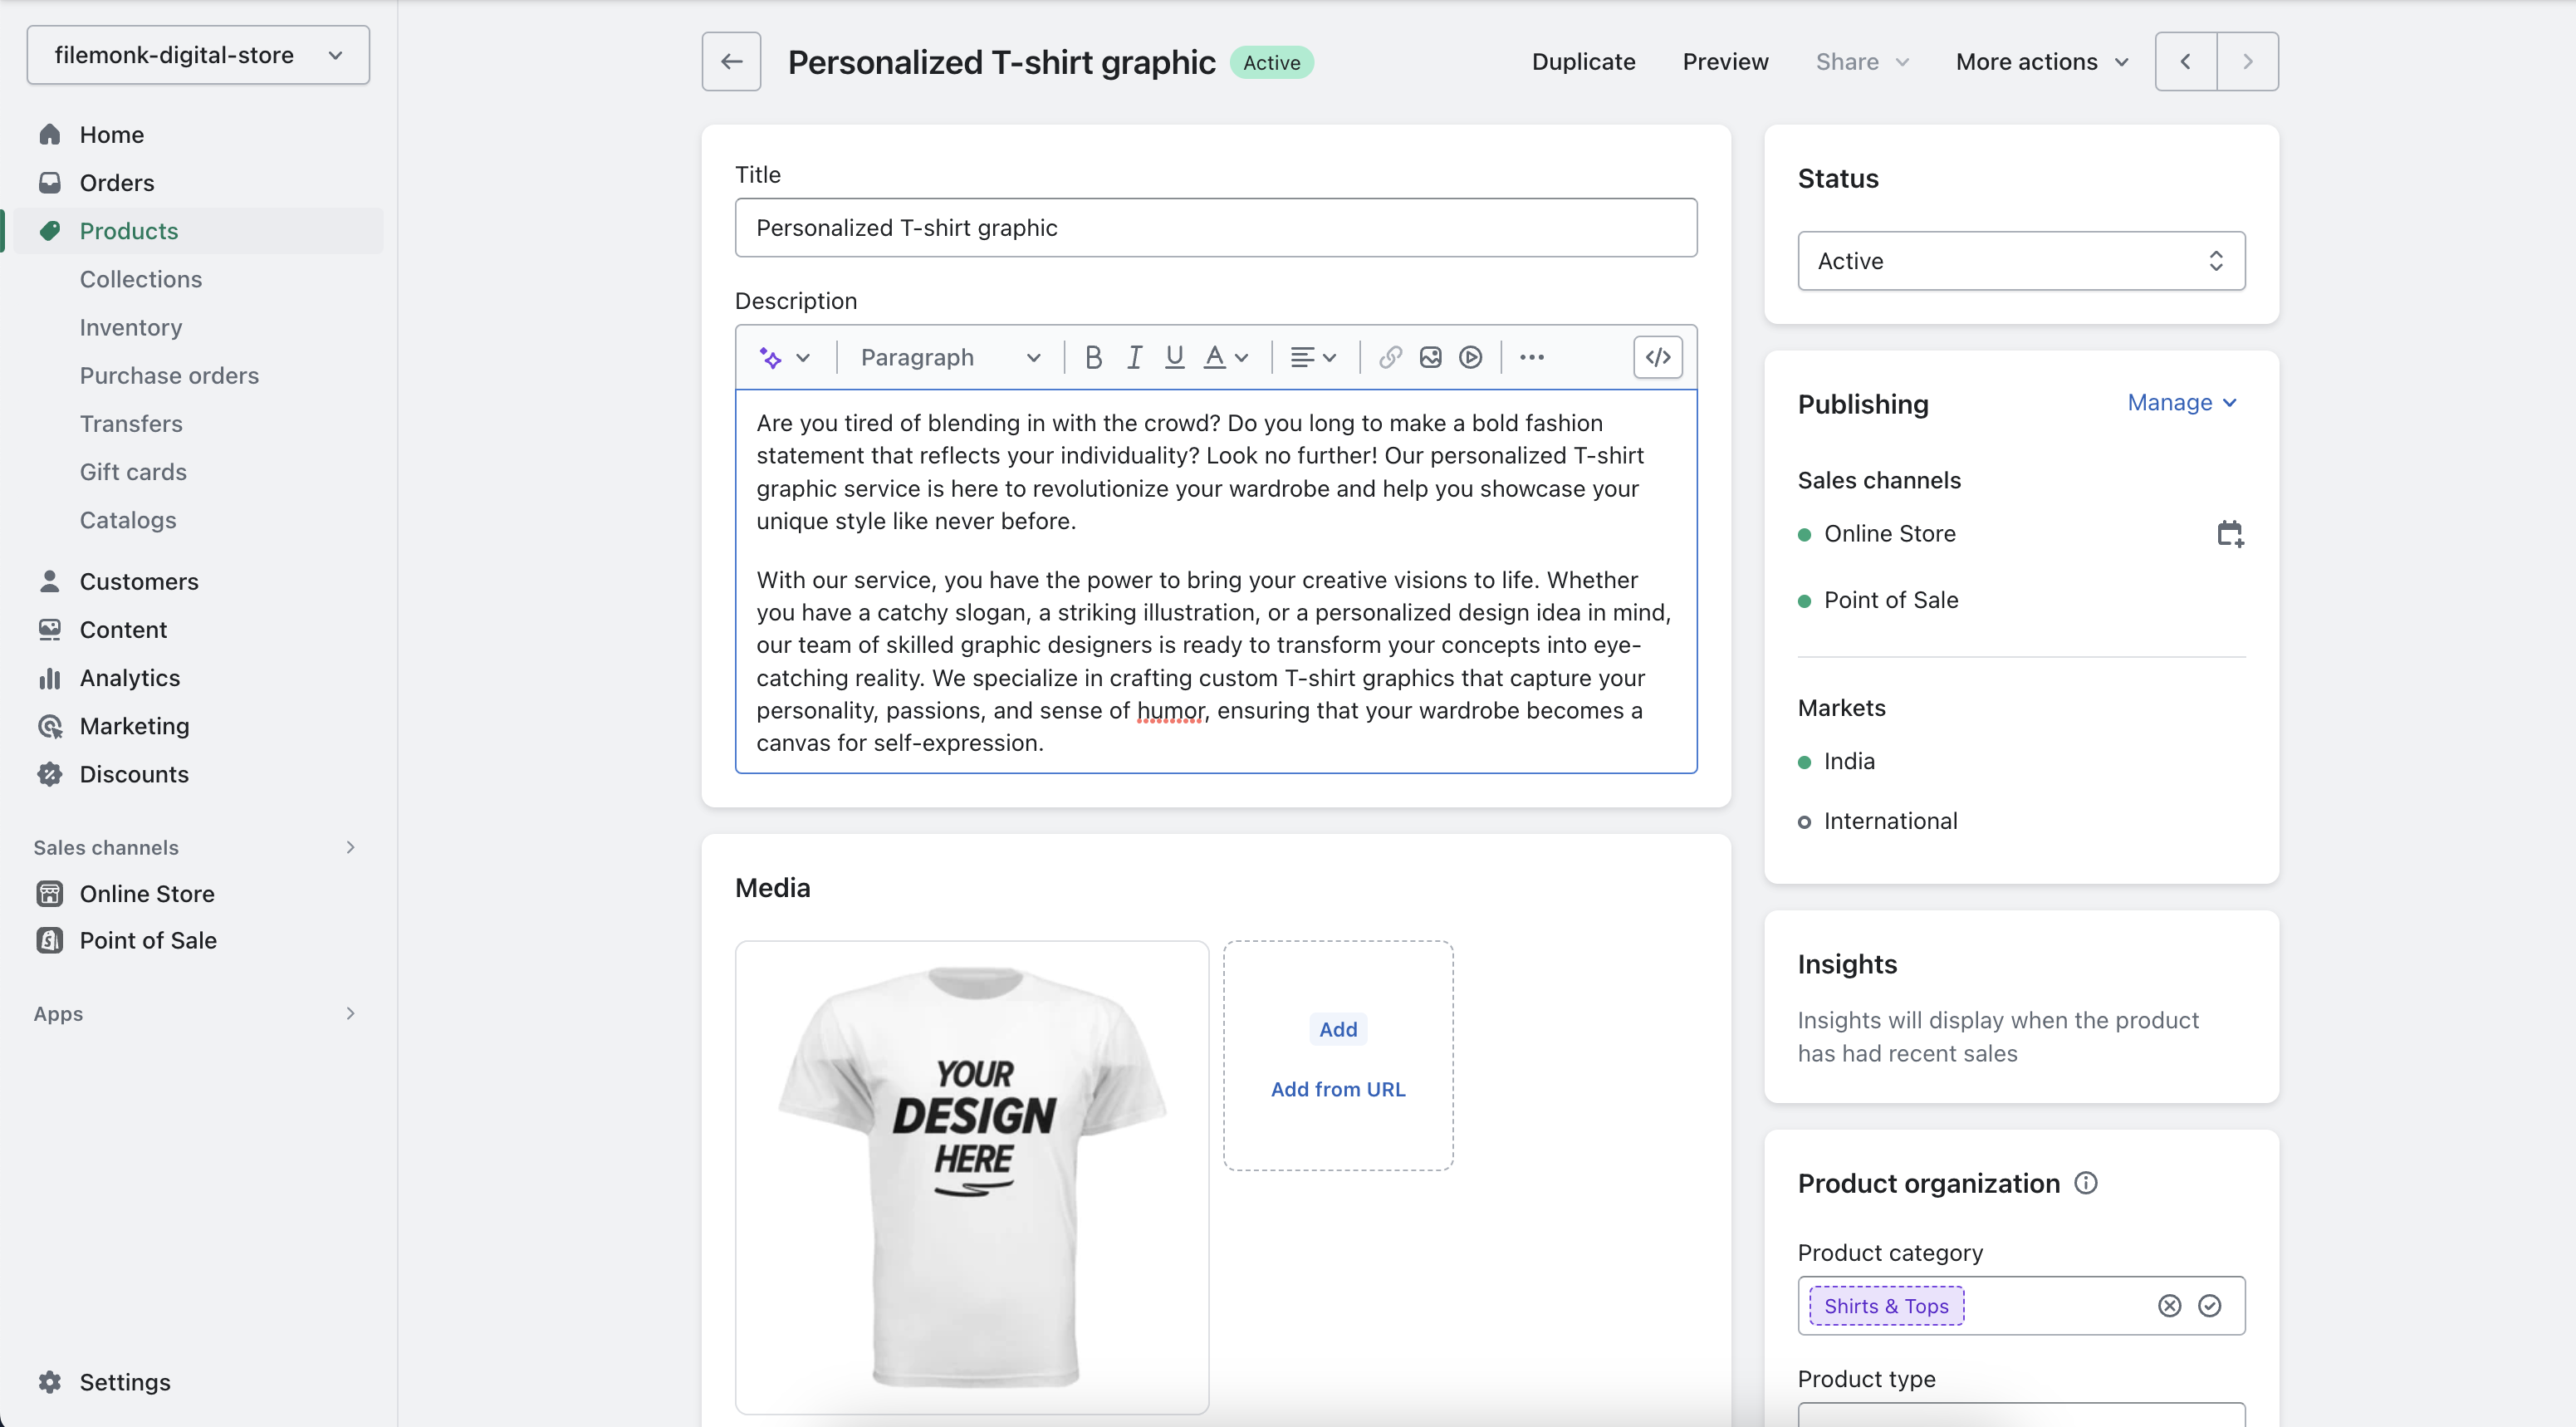
To help you understand how selling custom products work, let's set the stage with an example: As a designer, you sell personalized t-shirt graphics. You want a customer to place an order for the personalized graphic service. After getting the order, you get your client's requirements, prepare the graphics and then deliver it to them.
To set this up, follow these steps in Filemonk -
Step 1: Create Shopify product listing
Follow this guide to create a Shopify product listing for your custom service in Shopify admin. If you have multiple custom products, create a Shopify product for each of them.
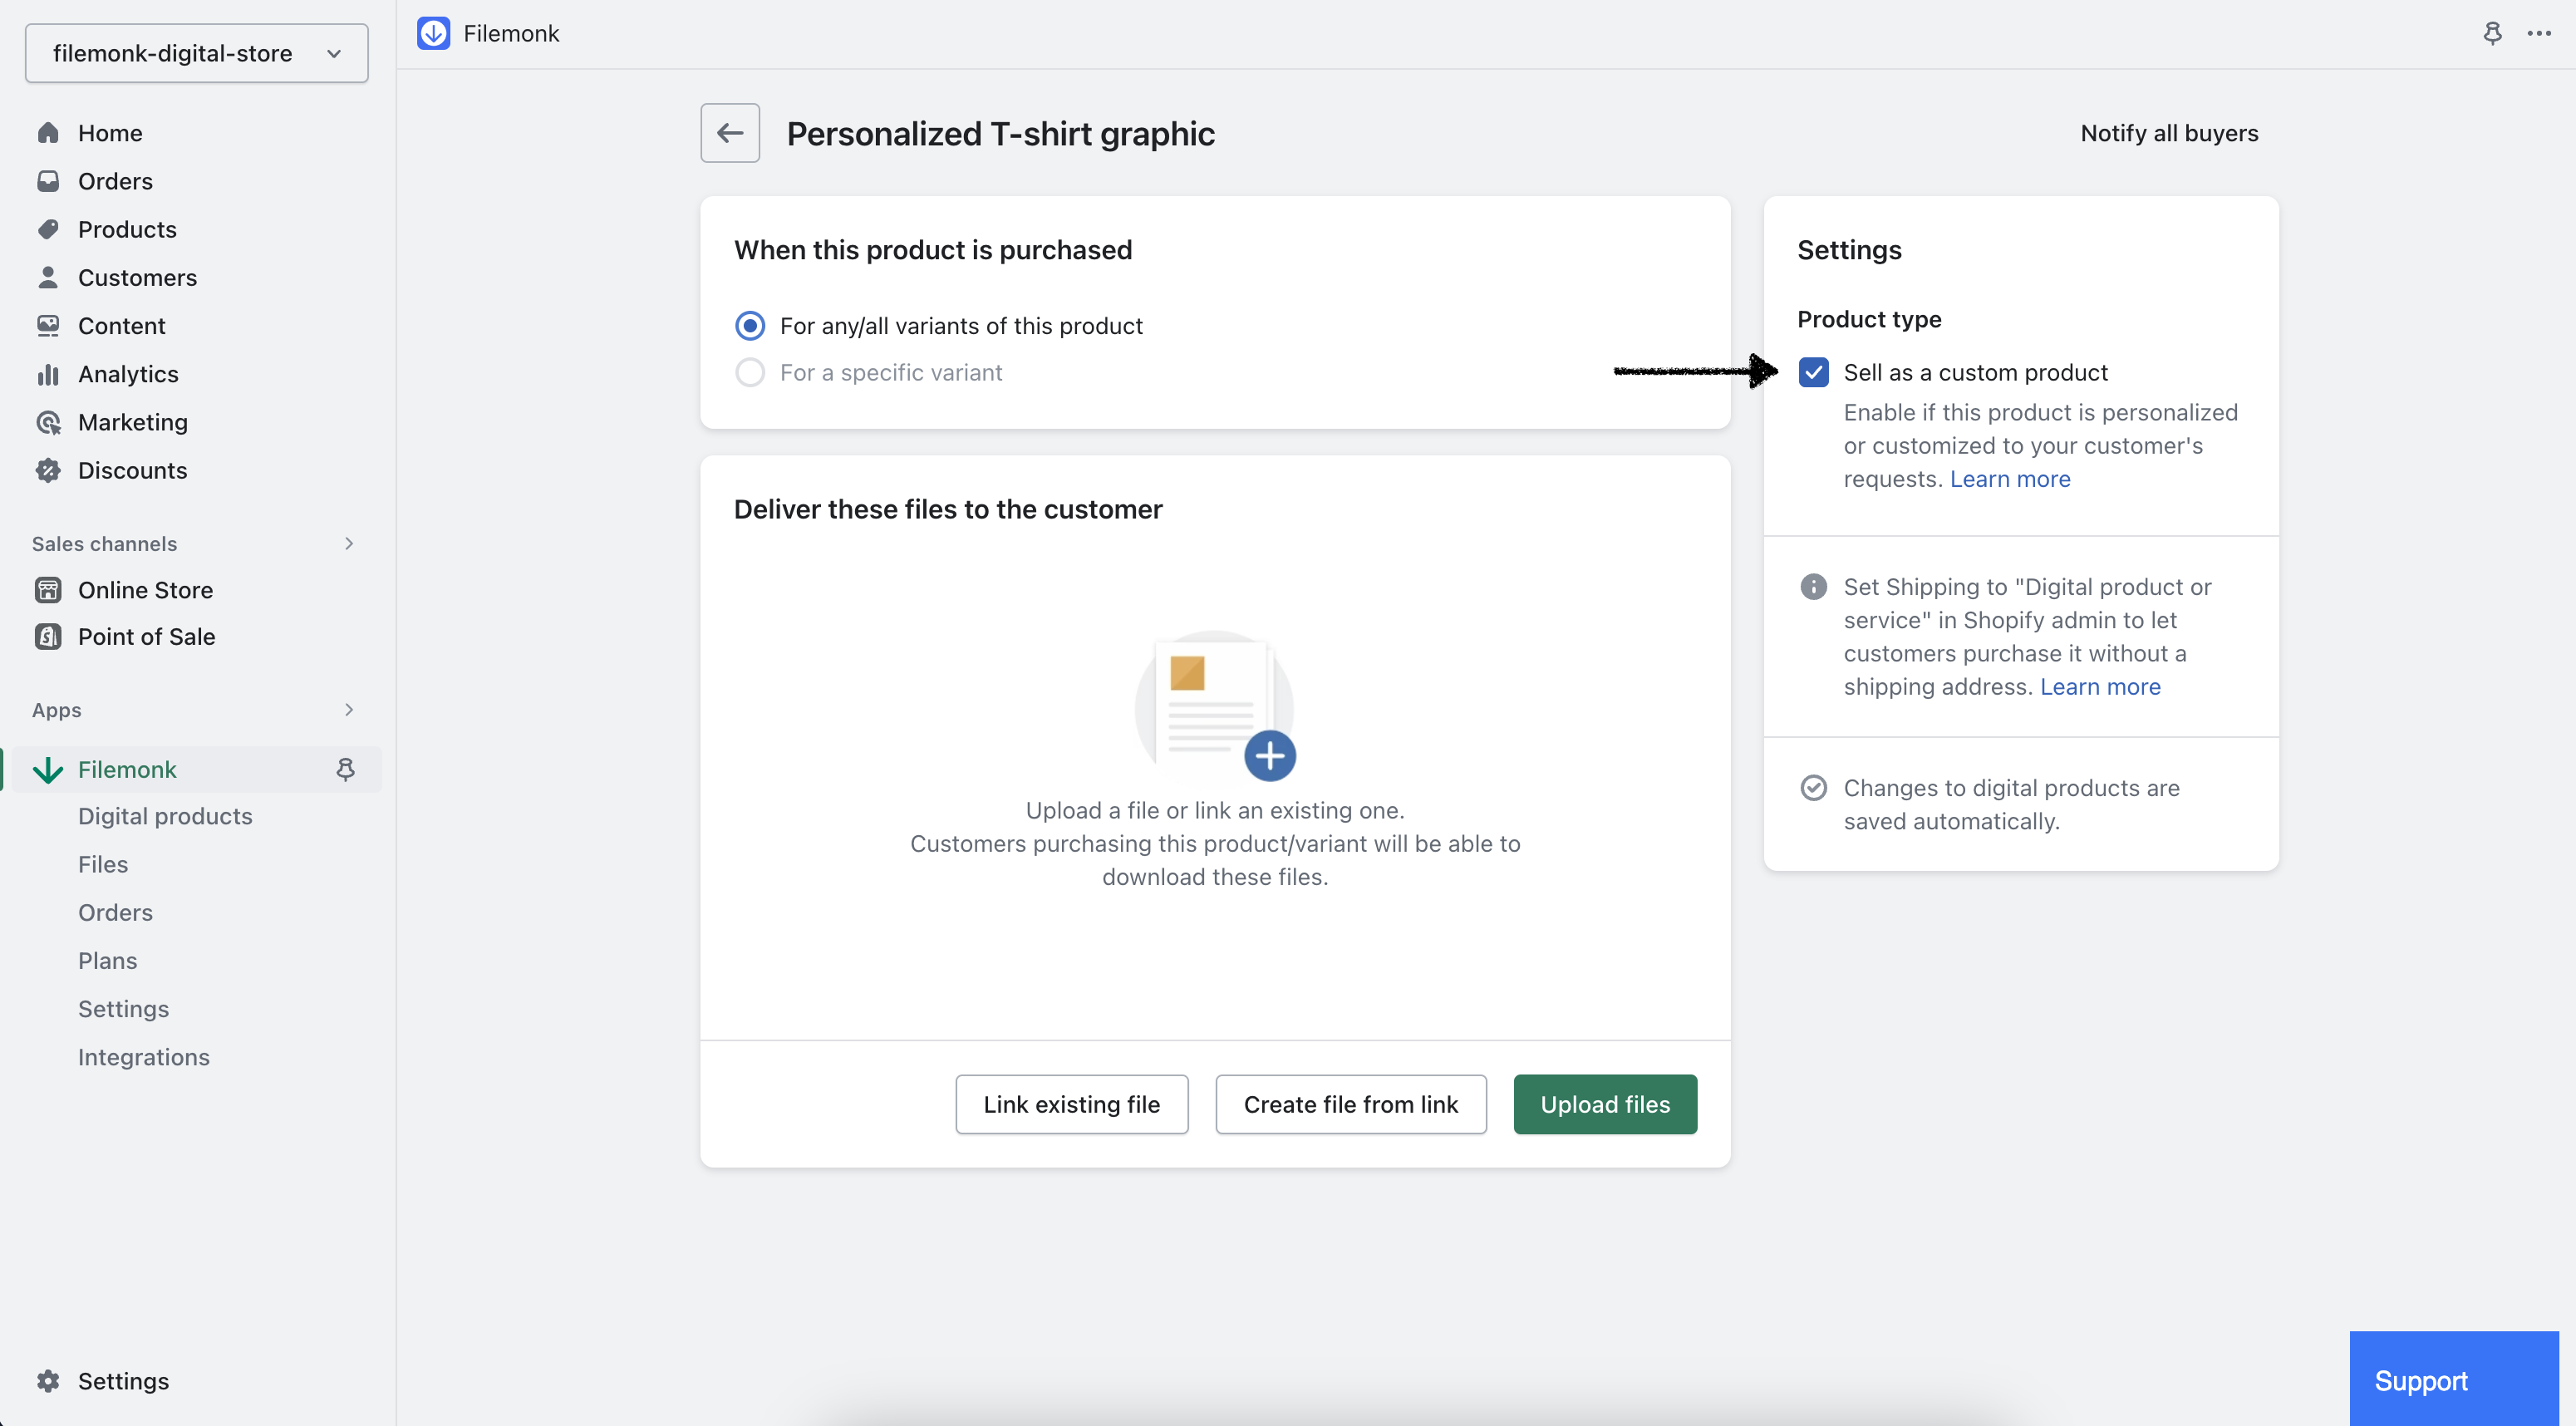
Step 2: Make it a digital product
After creating the product in Shopify admin, click "More Actions" towards the top right corner of your screen and hit "Manage digital downloads". You'll be redirected to Filemonk.
On this page, enable 'Sell as a custom product'. Your product is now ready to be purchased!
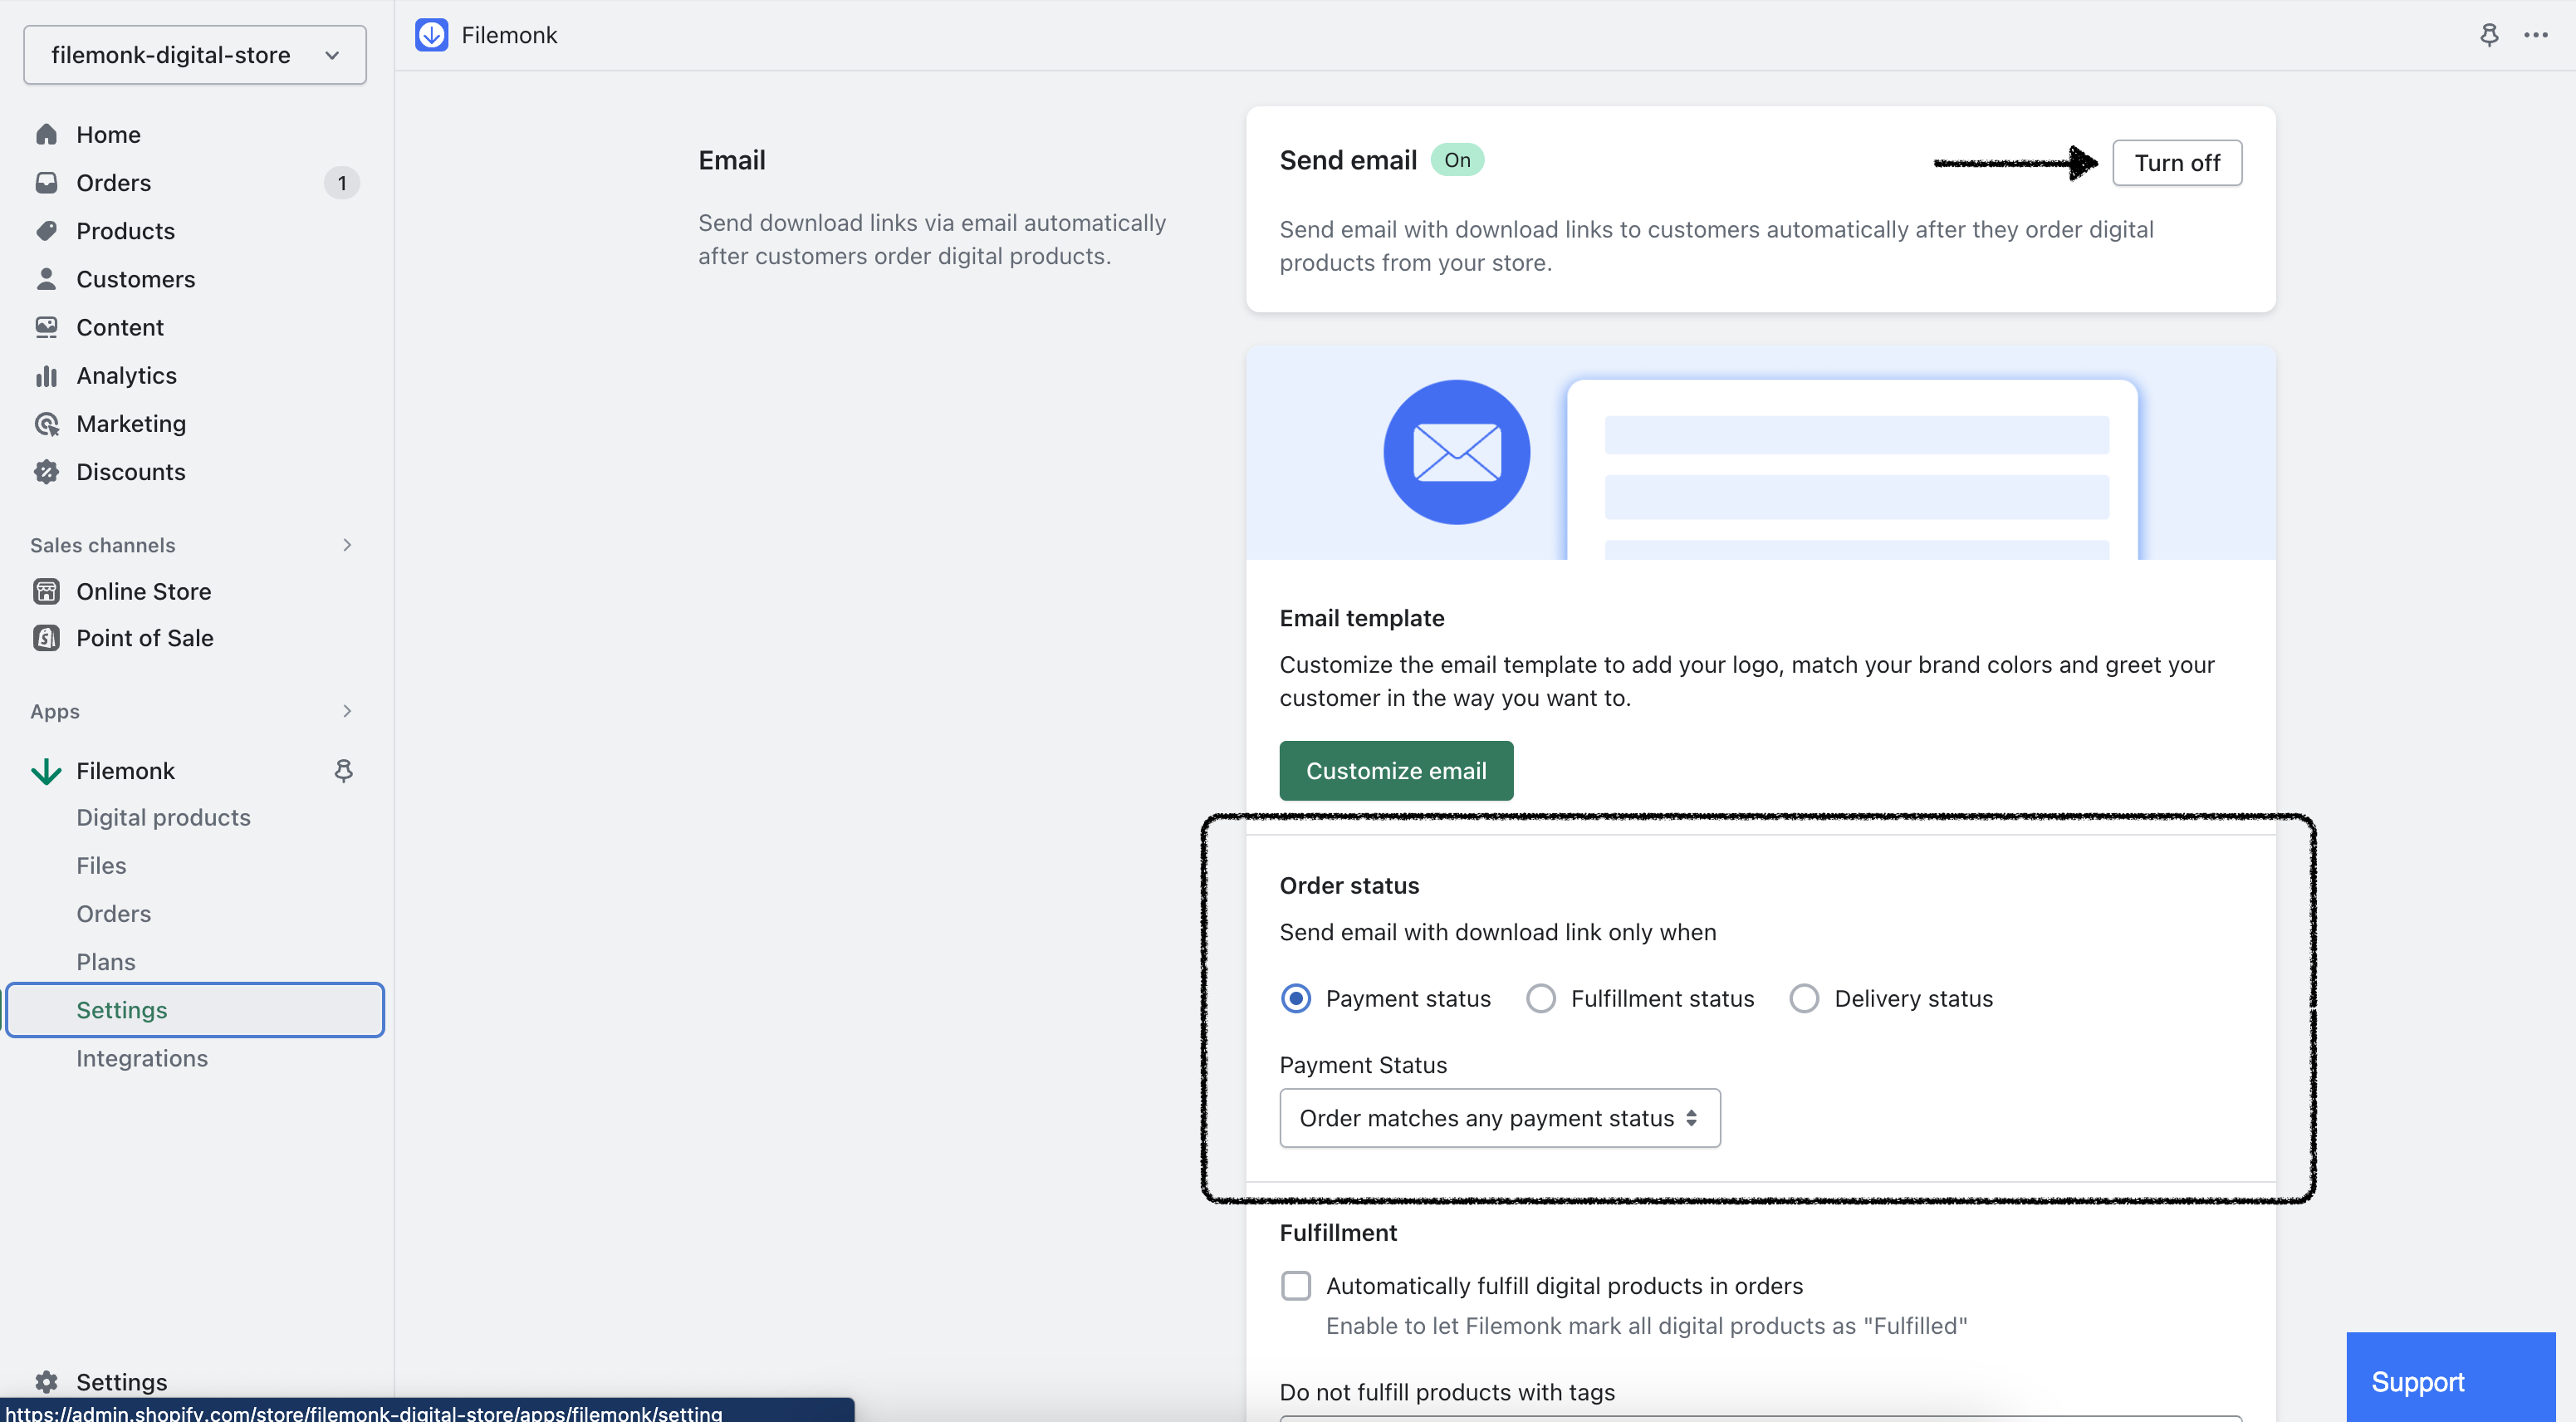
Step 3: Configure your settings
Click 'Settings' in the left menu bar, and locate the 'Email' section. Here, you can set up delivery of your files in one of 2 ways -
Based on fulfillment: If you'd like customers to receive their files when you fulfill the order, select 'Fulfillment status' and then 'Order is fulfilled' in the Order Status section.
Manual action: Disable 'Send email' if you want customers to receive their files only when you're ready to send it.
In our example, we'd like customers to receive the email only when we're ready to deliver it. So, we'll disable email delivery.
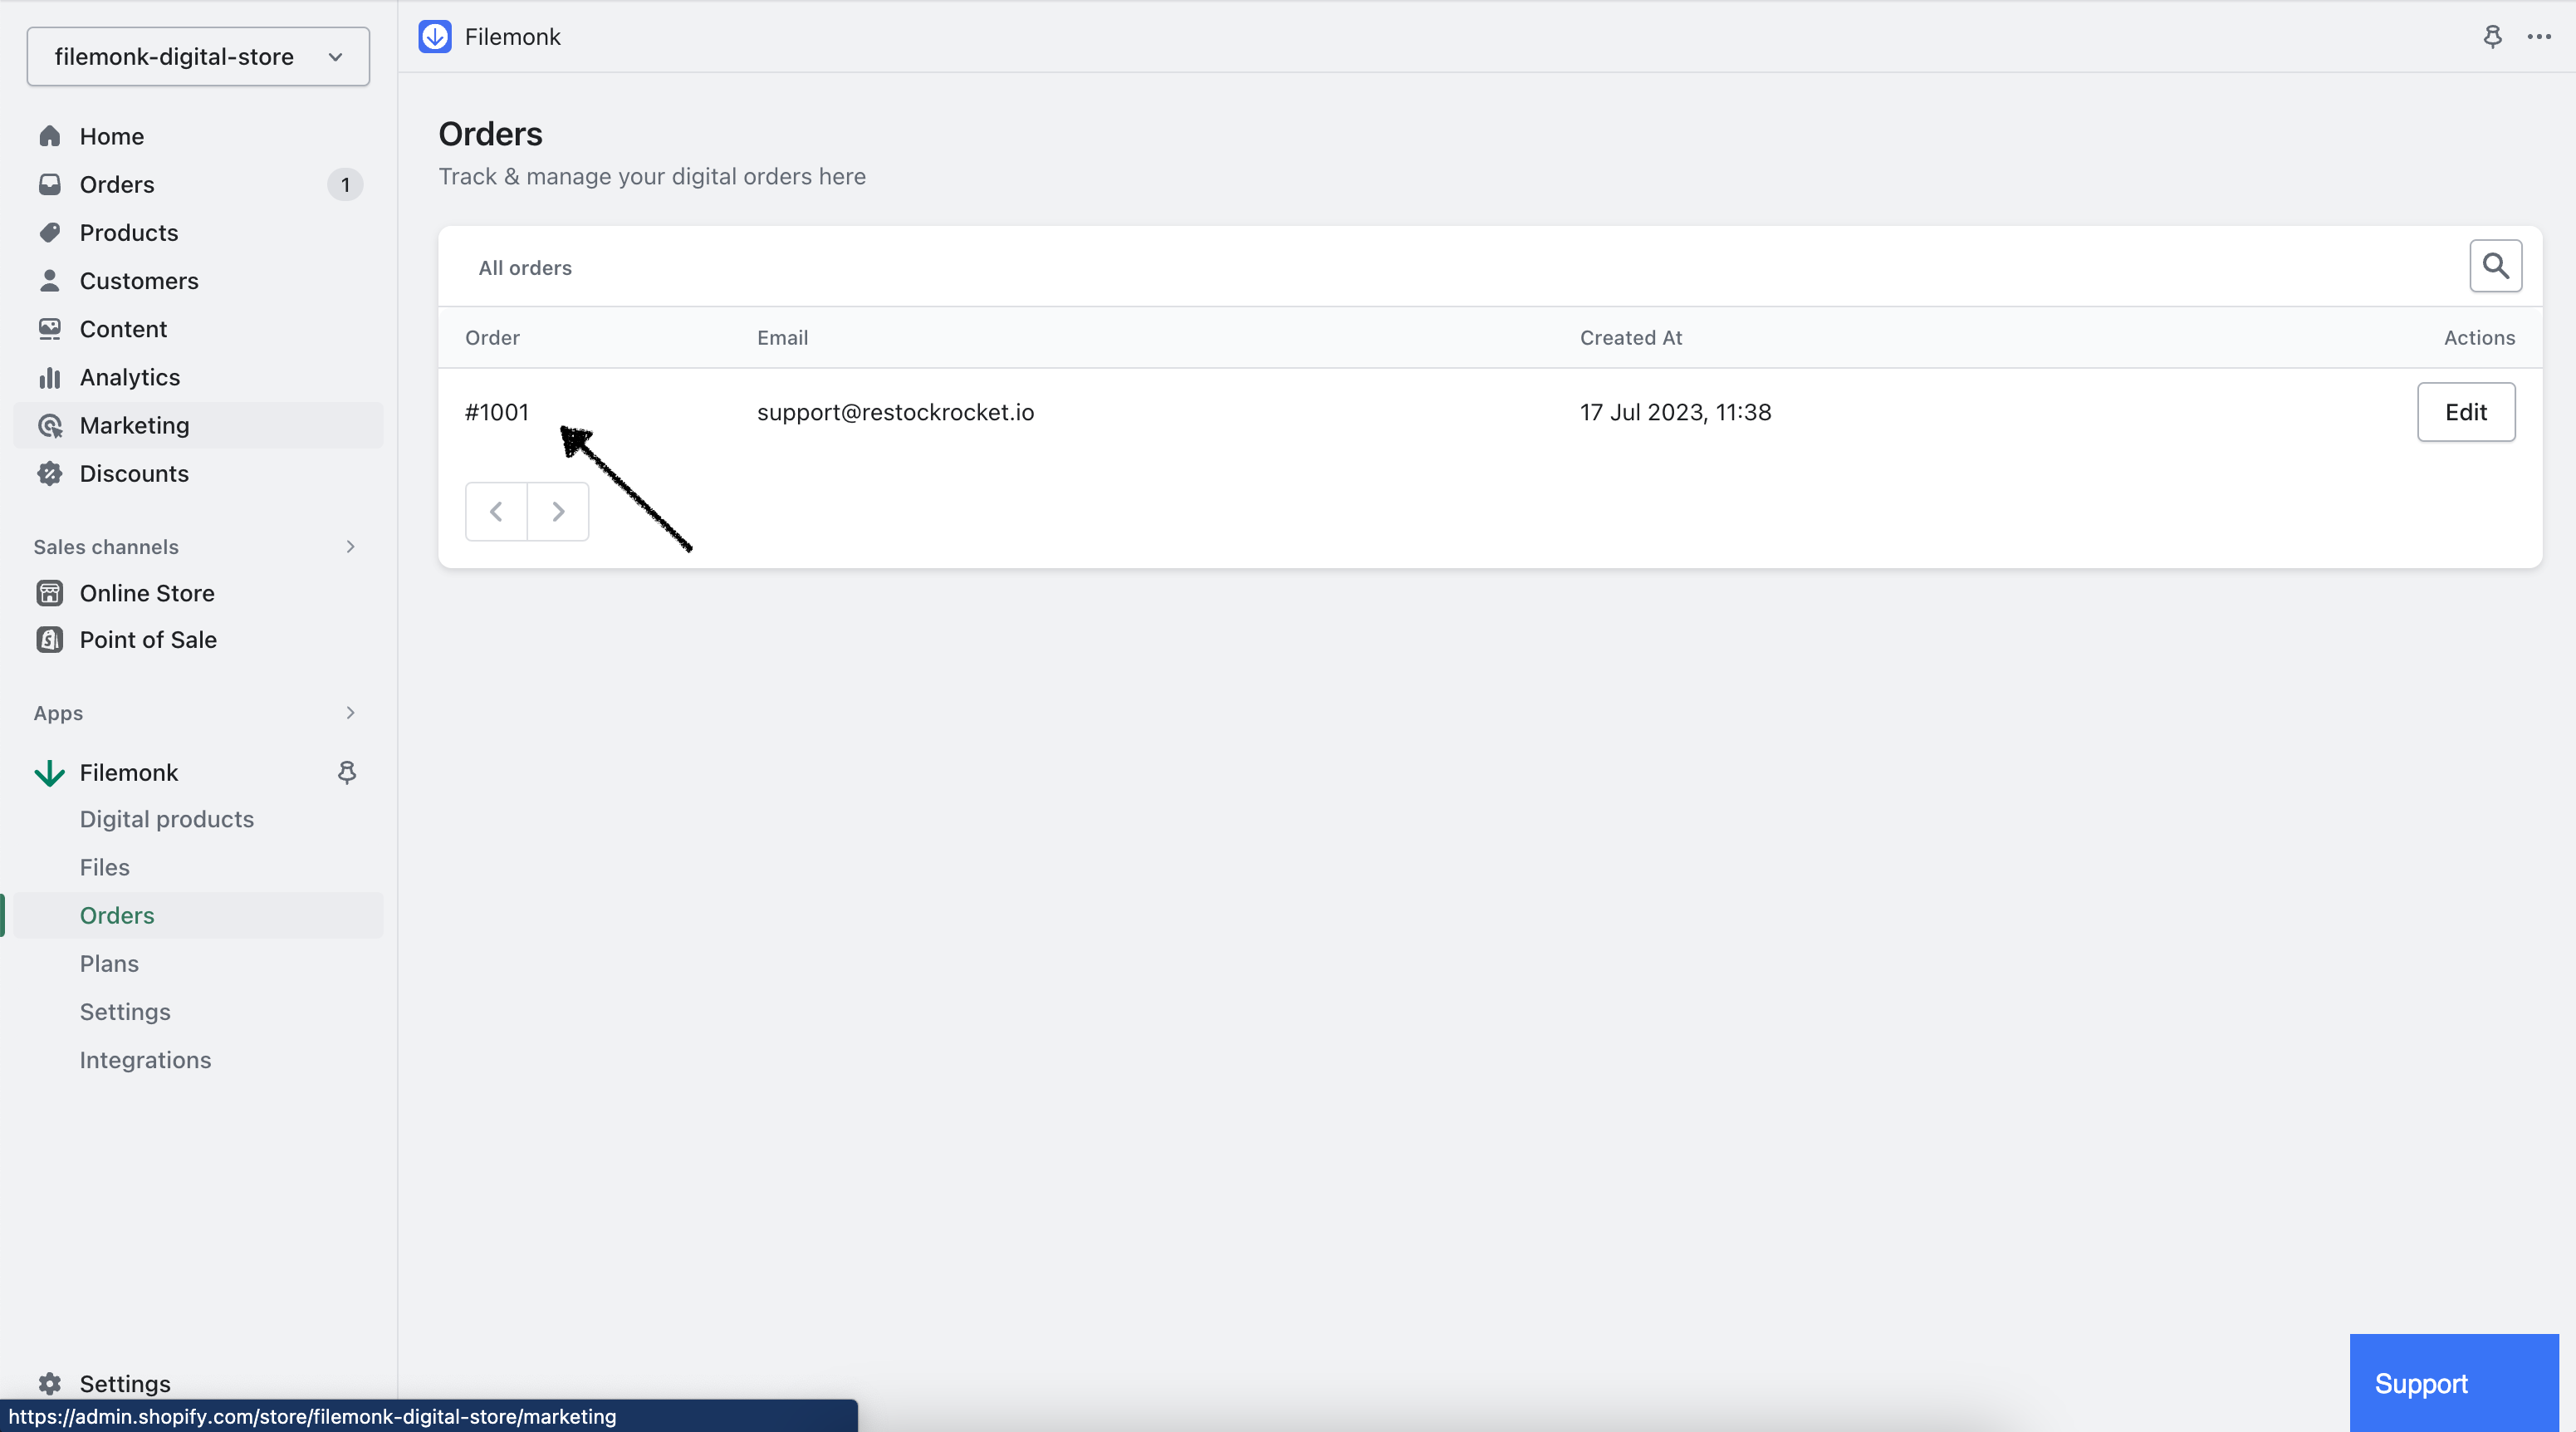
Step 4: Receive your order & prepare the content
You're now all set up to receive orders for your custom product. When a customer places their order, it will appear in the Orders section of Filemonk.
Prepare your content for the purchase. When you're ready, come back here and click on the order.
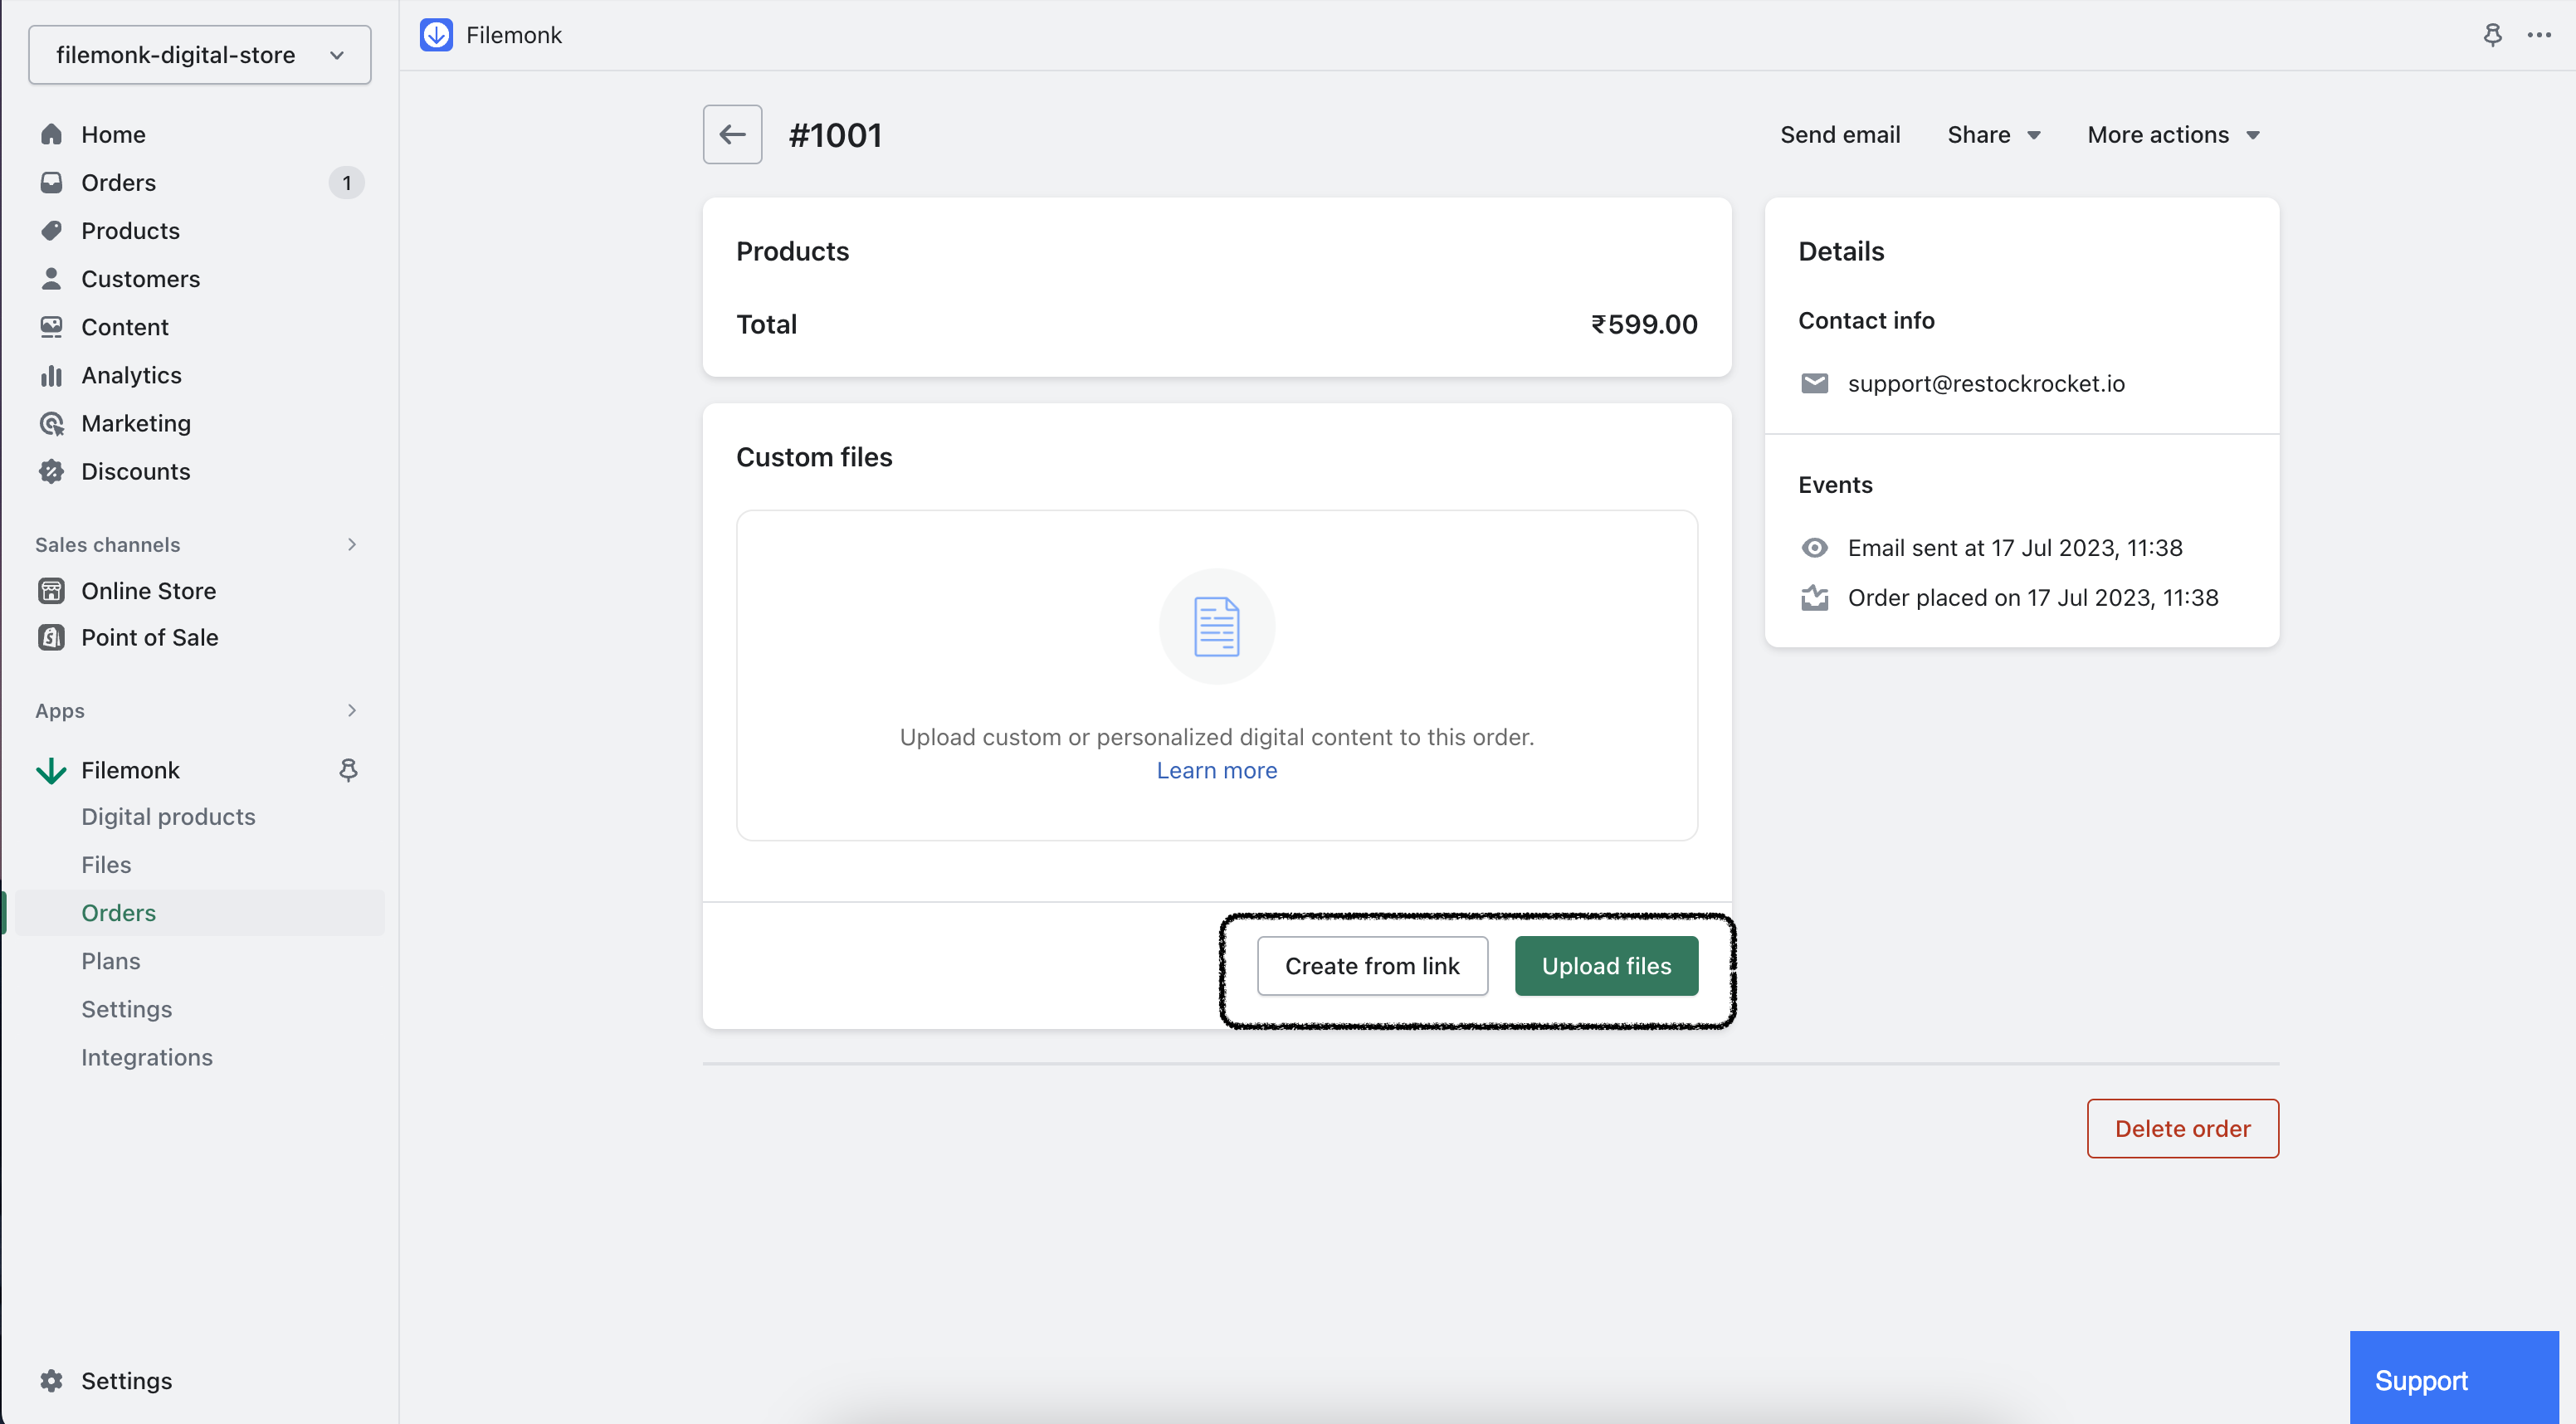
Step 5: Upload to the order
Scroll down to 'Custom files' and click any of the actions to prepare your files for delivery to this order.
Upload files: Upload one or more files stored on your computer.
Create file from link: Add a link to a file hosted on Google Drive, Dropbox etc.
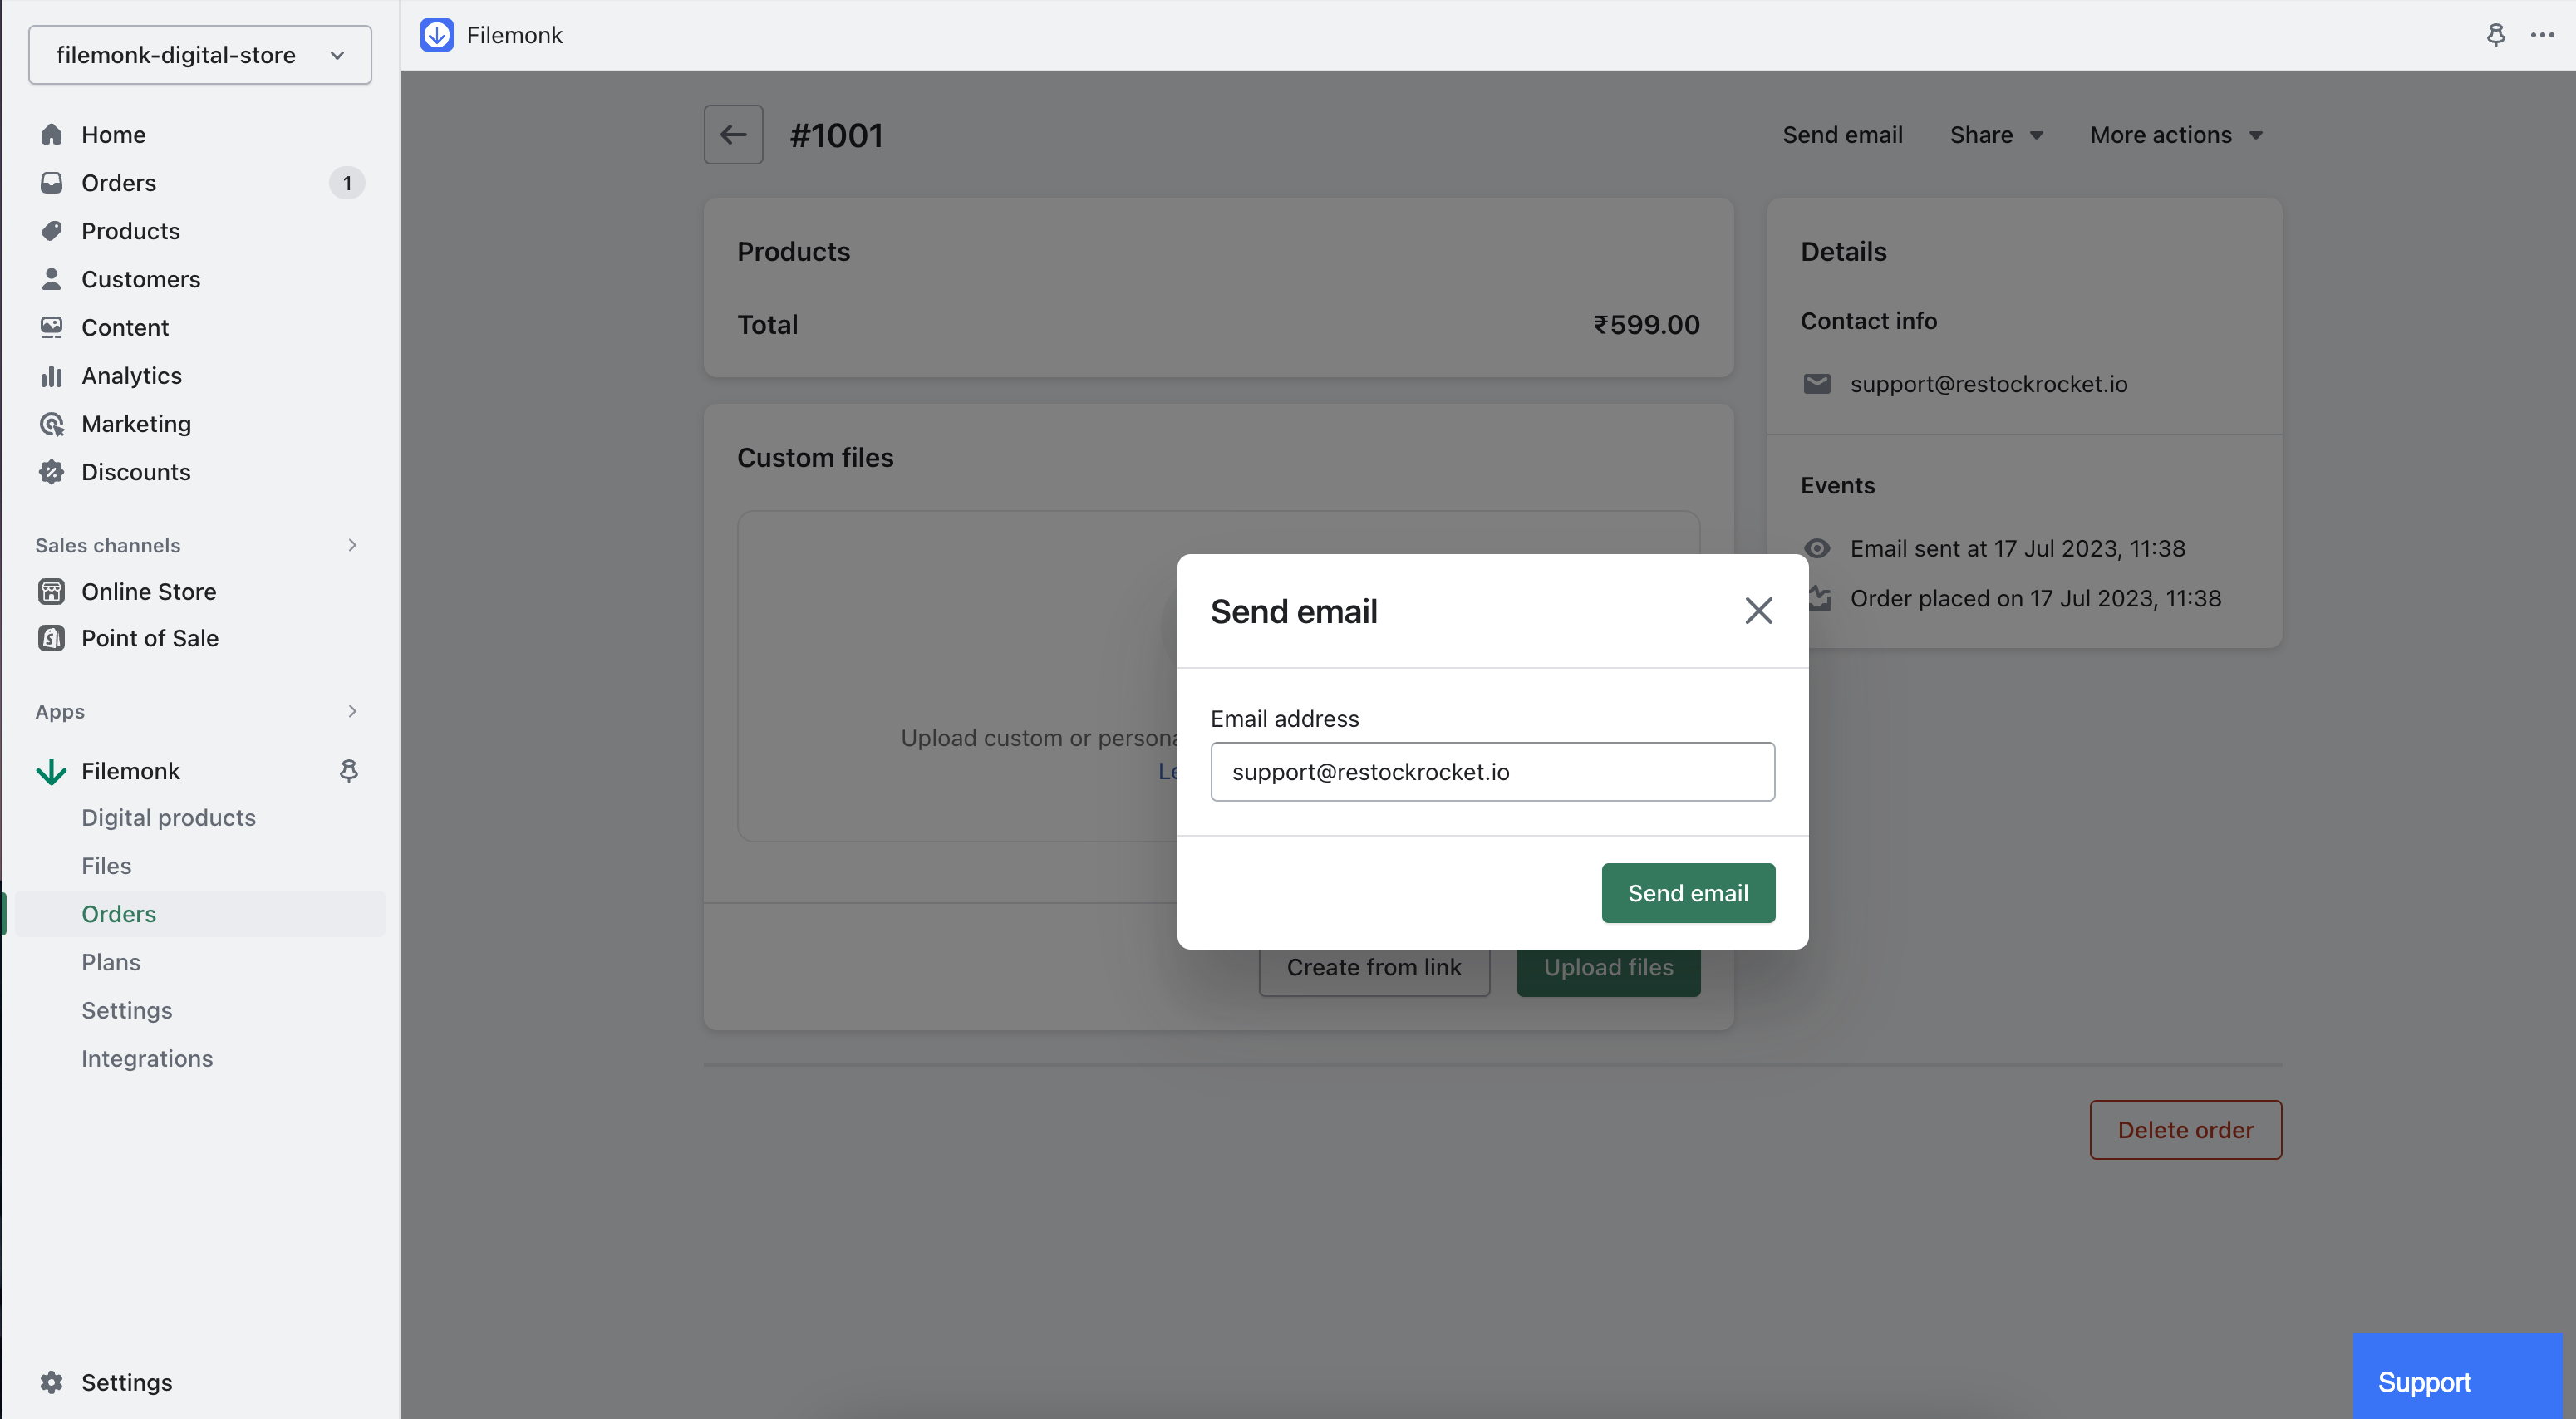
Step 6: Send!
And you're now ready to send your files!
If you selected 'Based on fulfillment' in Step 3, fulfill the order in Shopify admin. The download links will be sent to your customer right after.
If you selected 'Manual action', click 'Send email' in the top right section of this page.
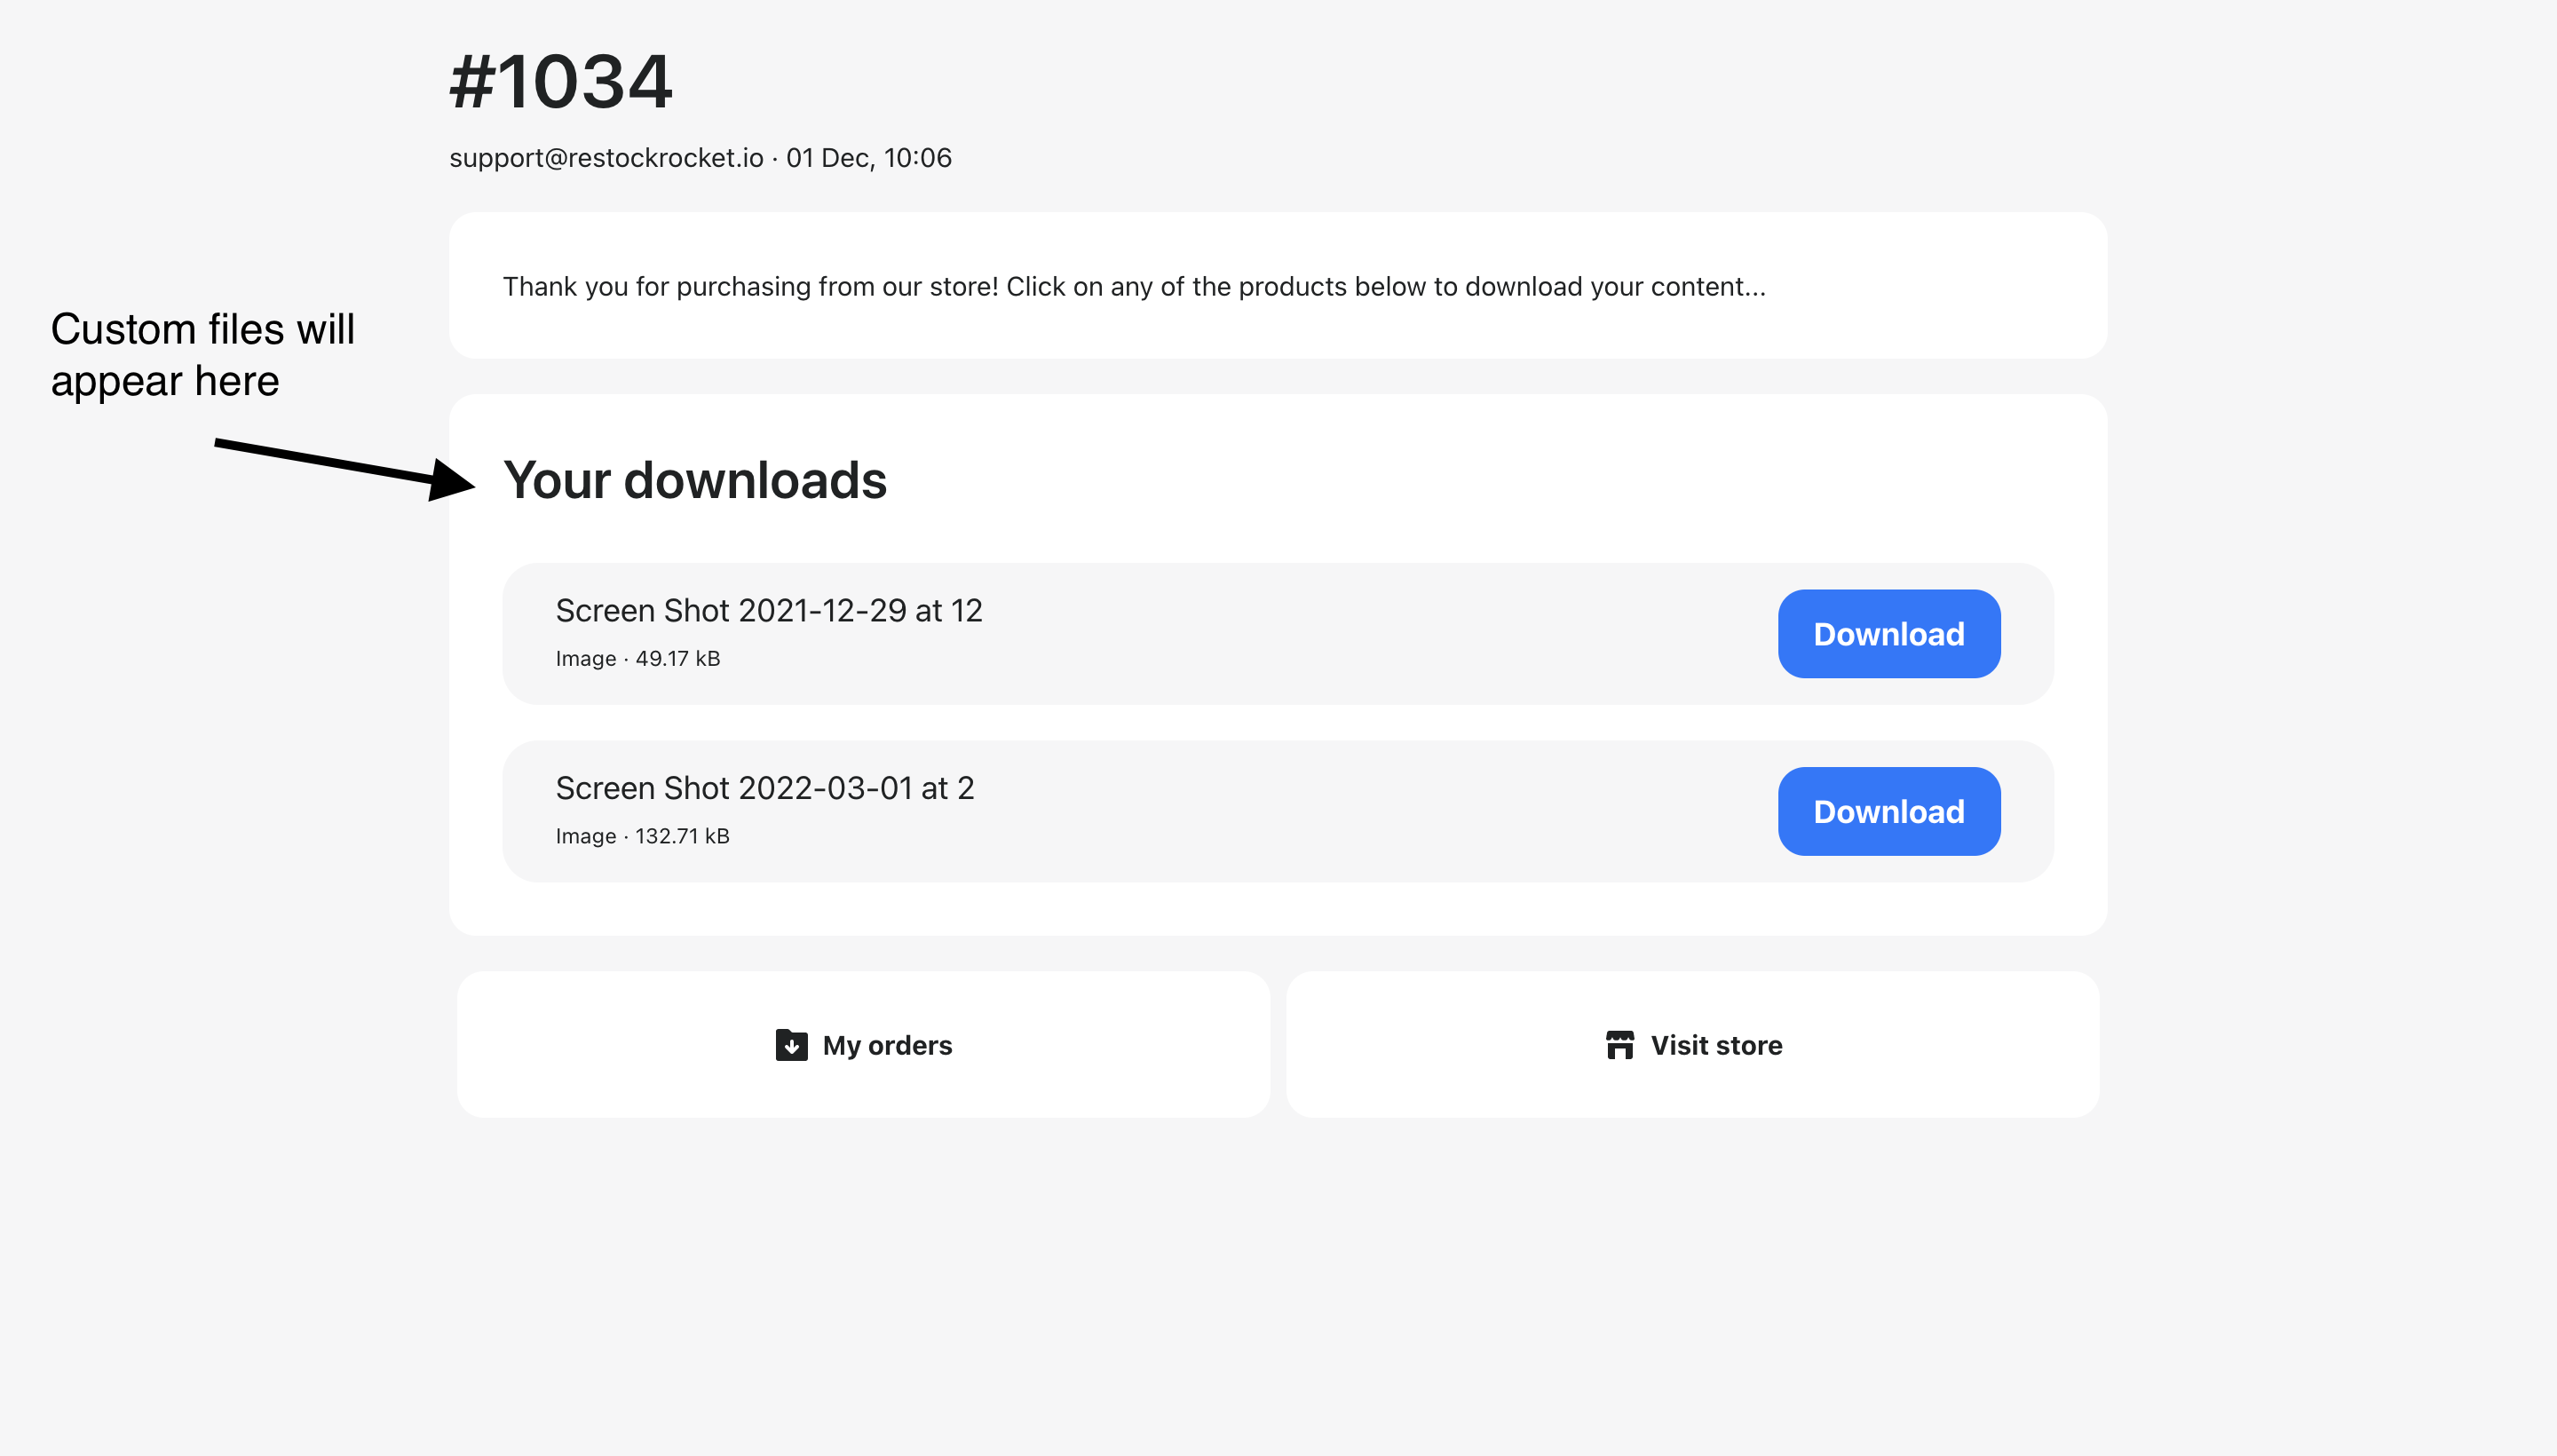
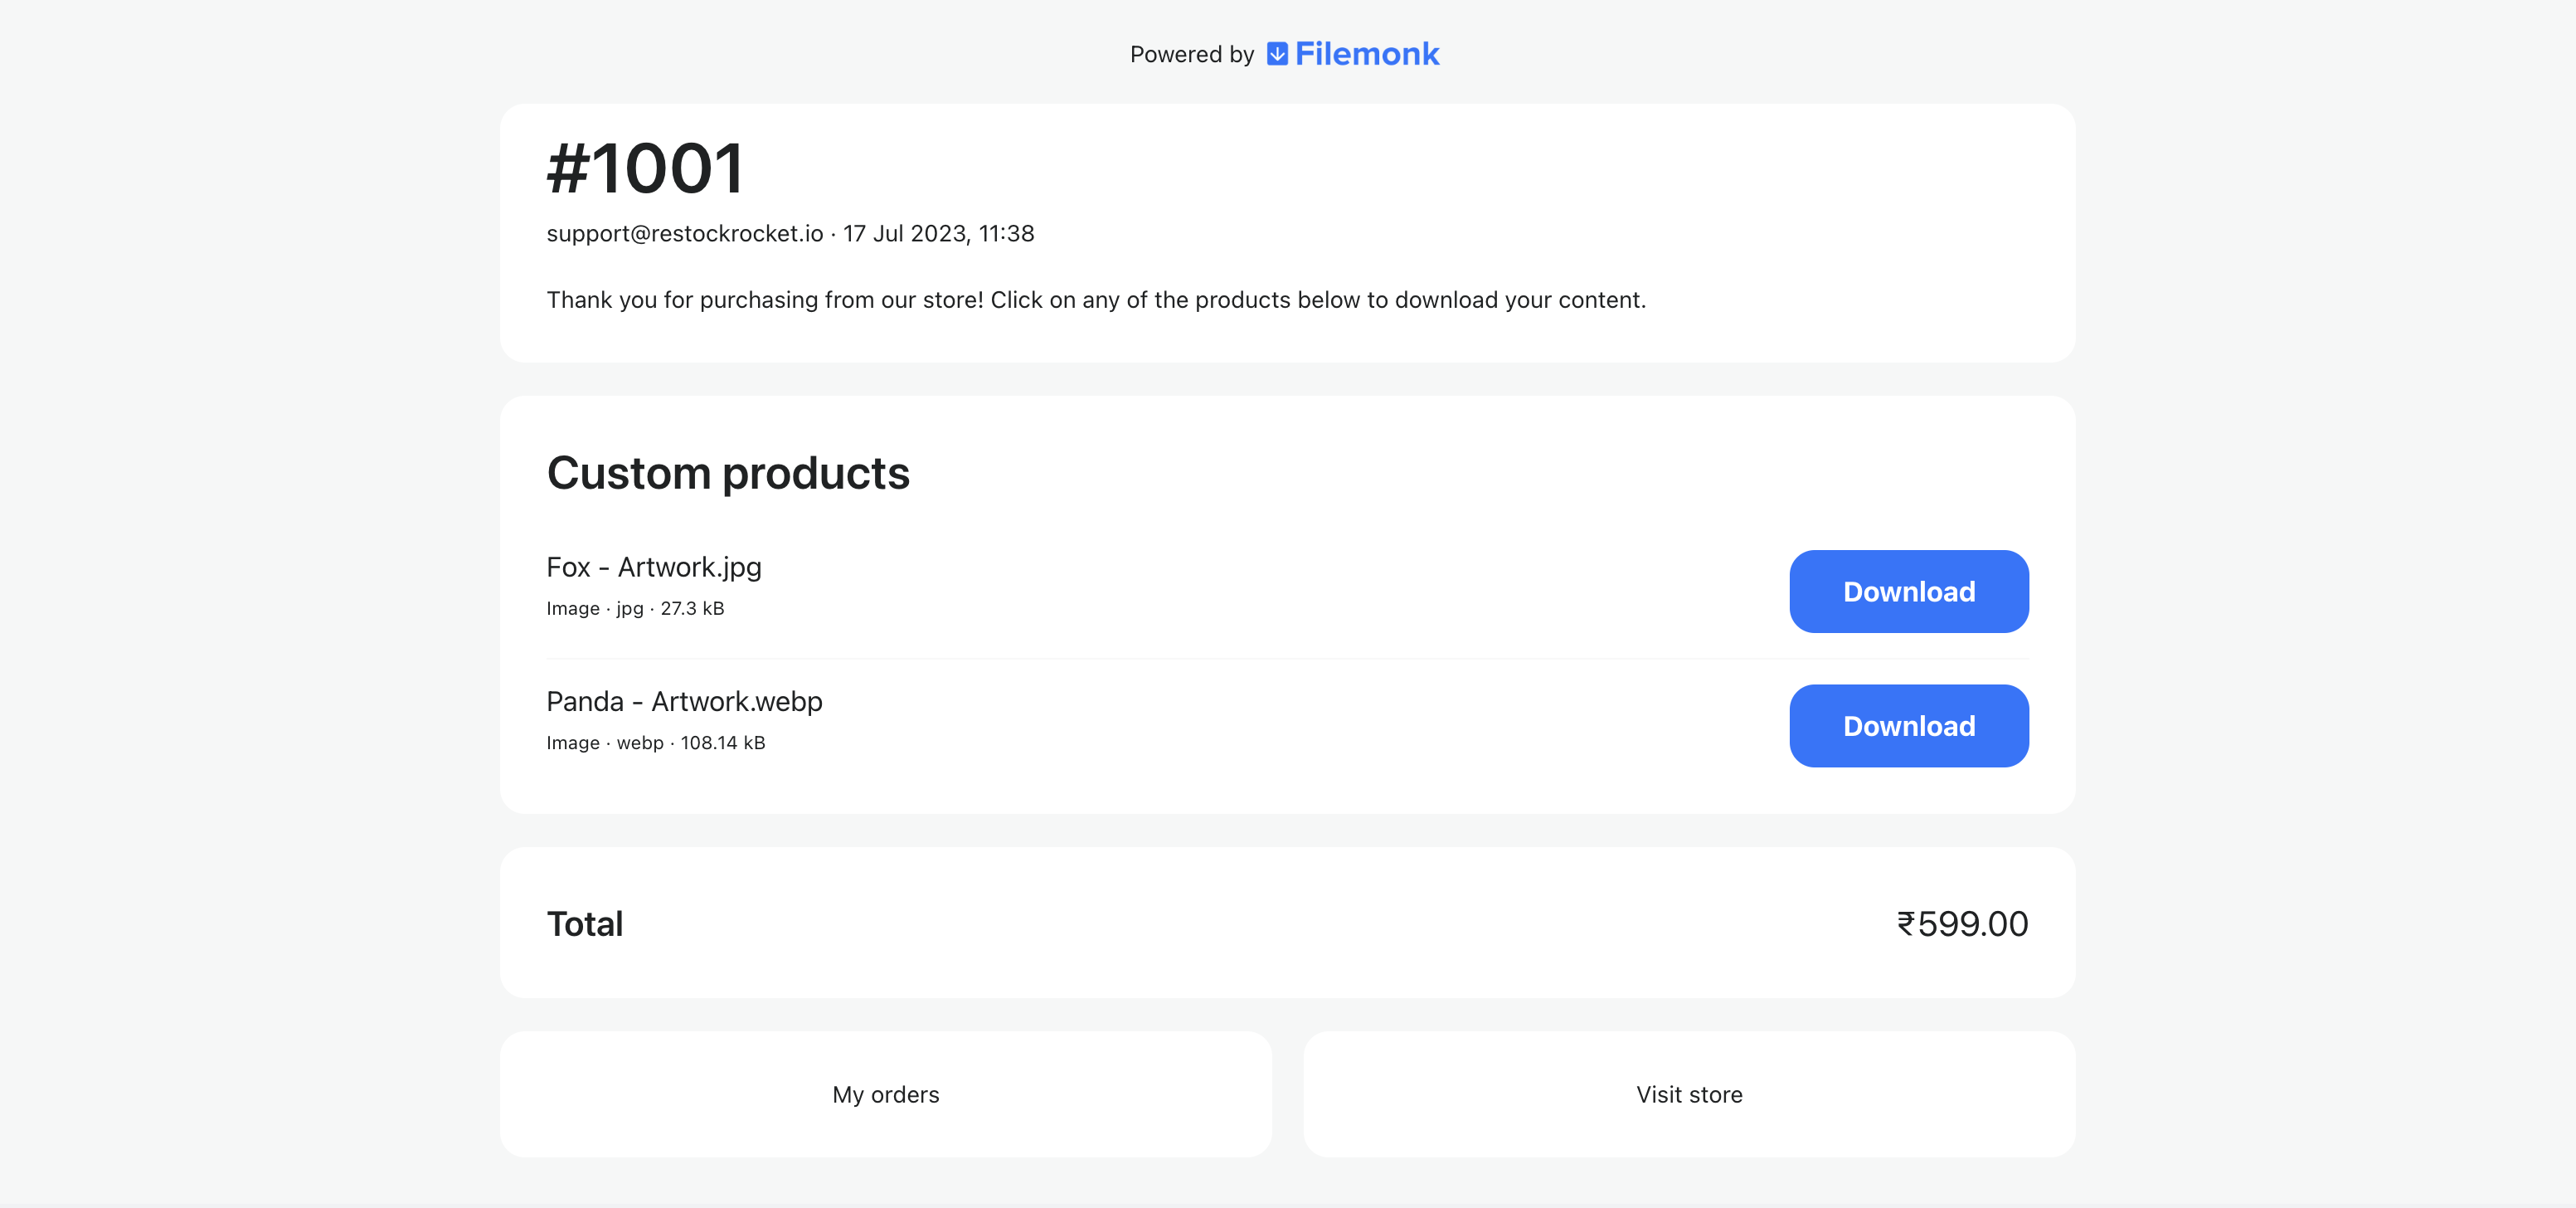
Your customer will receive a link to download their files. The link takes them to a Download page, where they'll see their custom files ready to download.
Need help? Click "Support" to chat with us live or reach out at [email protected]